RS PRO Aluminium Raspberry Pi Case for use with Raspberry Pi 4 in Black
- RS Stock No.:
- 230-9821
- Distrelec หมายเลขบทความ:
- 304-06-968
- ผู้ผลิต:
- RS PRO

ยอดรวมย่อย (1 ชิ้น)*
THB2,024.64
(ไม่รวมภาษีมูลค่าเพิ่ม)
THB2,166.36
(รวมภาษีมูลค่าเพิ่ม)
ส่งฟรีหากซื้อเกิน ฿2,500.00
มีในสต็อก
- 66 ชิ้นพร้อมจัดส่งจากคลังสินค้าต่างประเทศ
ต้องการสินค้าเพิ่มหรือไม่ ระบุจำนวนและคลิก ‘ตรวจสอบวันจัดส่ง’ เพื่อดูข้อมูลเพิ่มเติมเกี่ยวกับสต็อกสินค้าและการจัดส่ง
ชิ้น | ต่อหน่วย |
|---|---|
| 1 + | THB2,024.64 |
*ตัวบ่งบอกราคา / price indicative
ผู้ให้การสนับสนุน

- RS Stock No.:
- 230-9821
- Distrelec หมายเลขบทความ:
- 304-06-968
- ผู้ผลิต:
- RS PRO
คุณสมบัติ / Specifications
ข้อมูลทางเทคนิค / Technical Data Sheets
Legislation and Compliance
รายละเอียดสินค้า / Product Details
ค้นหาผลิตภัณฑ์ที่คล้ายกันโดยเลือกคุณลักษณะอย่างน้อยหนึ่งรายการ
เลือกทั้งหมด | คุณลักษณะ | ค่า |
|---|---|---|
| Brand | RS PRO | |
| Product Type | Raspberry Pi Case | |
| For Use With | Raspberry Pi 4 | |
| Series | RS PRO | |
| Colour | Black | |
| Body Material | Aluminium | |
| Standards/Approvals | RoHS | |
| เลือกทั้งหมด | ||
|---|---|---|
Brand RS PRO | ||
Product Type Raspberry Pi Case | ||
For Use With Raspberry Pi 4 | ||
Series RS PRO | ||
Colour Black | ||
Body Material Aluminium | ||
Standards/Approvals RoHS | ||
- COO (Country of Origin):
- GB
RS PRO Industrial Raspberry Pi 4 Enclosure
RS PRO is proud to introduce this excellent solution for the Raspberry Pi 4. This well-thought-out enclosure offers the very best in design and functionality and comes with a heatsink kit included. Upon inspection, the enclosure is supplied in kit form which is a pleasure to assemble with each part integrating seamlessly. The enclosure is made from aluminium and has 108 mm x 30 mm external dimensions.
What are the benefits?
The RS PRO Industrial Raspberry Pi 4 enclosure is a rugged enclosure kit. By utilising a micro HDMI Pi 4 extender board it can turn the power and micro HDMI connectors through 90°. The ethernet and USB connectors are on the same path, the rear panel is made from 3mm acrylic and allows for communication via Bluetooth and Wi-Fi signals from the Pi4.
Why would you choose this Pi enclosure?
The Raspberry Pi 4 is a delicate piece of hardware that needs to be safeguarded from external elements. This Pi enclosure once assembled is purpose-built to house the device inside and offers protection from contaminants, damage, or breakage. Heatsink kit is included.
Features and Benefits
Dimensions
RS PRO Industrial Raspberry Pi 4 Enclosure Variants
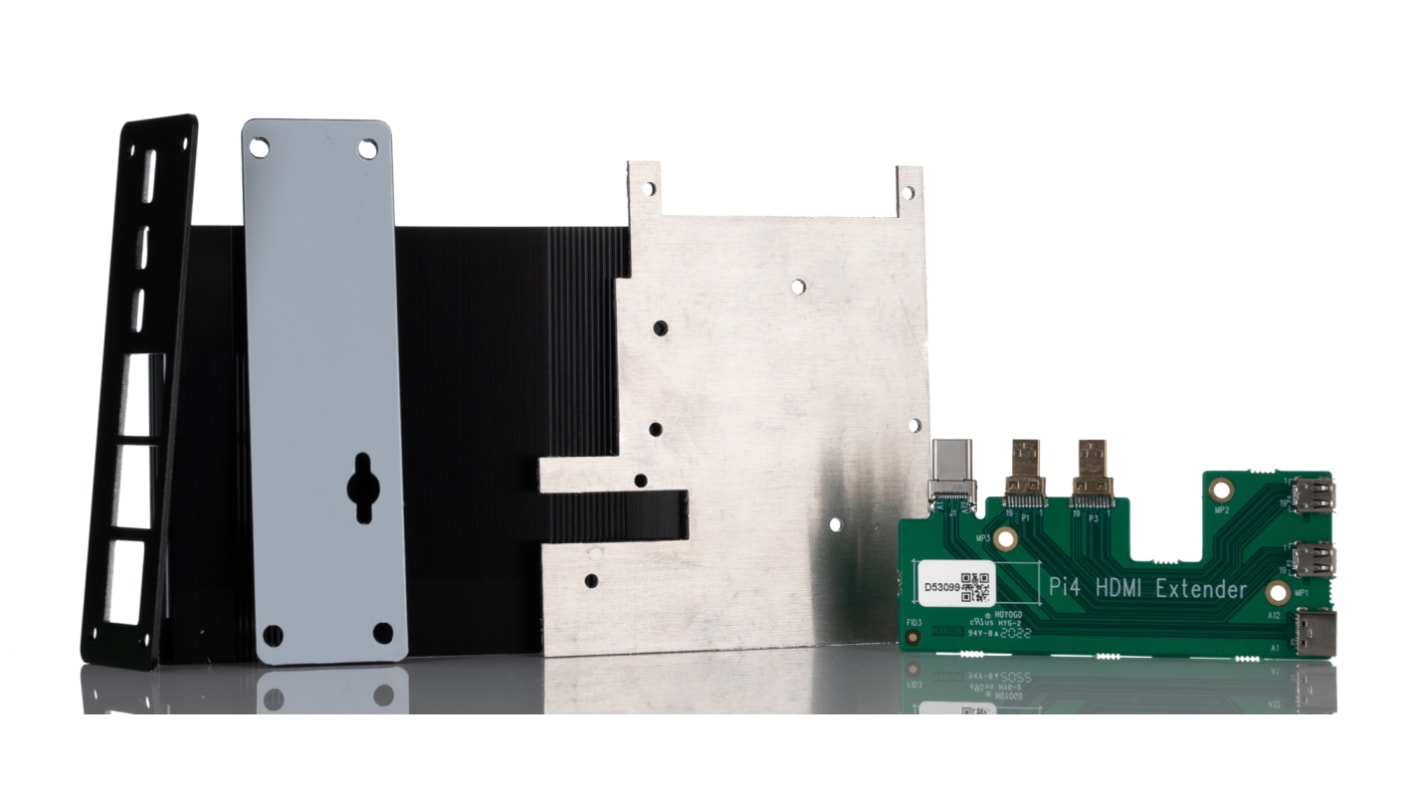
Kit Contains
Assembly Instructions
1. Take carrier plate (g) & attach standoffs (c) & (d) with screws (b). Attach small heat block (j) and large heat block (l) to carrier plate (g) with screws (n).
Peel the backing paper from the small heat pad (k) & stick the small heat block (j). Do the same for large heat pad (m) & large heat block (l). Now remove the remaining backing paper.
2. Plug extender board (f) into the HDMI & USB connectors on the Raspberry Pi board.
3. Place Raspberry Pi & extender on carrier plate assembly & secure with screws (b).
4. Turn board assembly over so carrier plate is on top & slide into the top slot of extrusion (h) as shown.
5. Attach aluminium (e) & acrylic (i) end plates to extrusion (h) with screws (a).
ลิงก์ที่เกี่ยวข้อง
- RS PRO Aluminium Raspberry Pi Case for use with Raspberry Pi in Black
- RS PRO Aluminium Raspberry Pi Case for use with Raspberry Pi 4 in Silver
- RS PRO Aluminium Raspberry Pi Case for use with Raspberry Pi in Silver
- DesignSpark Aluminium Case for use with Raspberry Pi 4 in Black
- KKSB Aluminium Raspberry Pi Case in Black
- KKSB Aluminium Raspberry Pi Case in Black, Grey
- Takachi Electric Industrial Aluminium Raspberry Pi Case for use with Raspberry Pi
- DesignSpark Aluminium Case for use with Raspberry Pi 3 B in Black