 1. Hello User! - Introduction to Arduino Robot
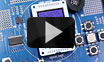 2. LOGO and Remote control your Robot
 3. Avoid obstacles, create strategies
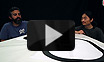 4. Following lines, going to the rescue
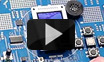 5. Images and sounds
5. Images and sounds
In this video you will learn about using the screen and playing sound on the robot's speaker.
The Arduino team cares about the robot user experience and has commissioned three different songs that can be played while
the robot is busy doing other things!
David and Xun upload the “DiscoBot” example to the Arduino Robot and show
how to navigate through the different sounds using the keypad.
You can create your own songs using tracker software like Milkytracker or Protracker and a template provided with the Arduino
Squawk library, the library the robot uses to play sounds.
The robot can play up to four simultaneous voices on the speaker. This means it is possible to compose music using up to four
instruments being played in parallel. Once you have composed your song, you can just store it on the uSD card and the robot
will be able to recall the different sound files via simple commands.
Images can also be passed to the robot via the uSD card. The “Slideshow” example shows how to load different images and how
to navigate through them using the keypad. Xun also explains how to use the compass as a tilt sensor to get the images to
change when tilting the robot to one side or the other.
The robot's screen supports colour 24 bits BMP images at a 160x128 resolution. We can see how David creates a BMP image using
the free-software GIMP, stores in the uSD card and then loads it on the robot via code.
Related products


