 1. Hello User! - Introduction to Arduino Robot
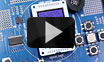 2. LOGO and Remote control your Robot
 3. Avoid obstacles, create strategies
 4. Following lines, going to the rescue
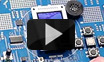 5. Images and sounds
1. Hello User! - Introduction to Arduino Robot
In this video, you will see how to unbox the Arduino Robot and mount it
as well as an example on how to use the Arduino IDE to program the robot.
After an introduction by Massimo Banzi, Arduino Co-founder David Cuartielles, assisted by Arduino's Interaction Designer
Xun Yang, explain how the robot can be used to make learning about electronics and mechanics easy.
The robot was developed together with Complubot, a Robotics association from
Spain. This association was founded by Ivan Gallego, Nerea de la Riva and Eduardo Gallego and they have many years of experience
creating robots that compete in the international RoboCupJunior competition.
The Arduino Robot is a great platform to introduce people with an interest in Robotics to learn the basics. It comes pre-assembled
(except for the parts shown on this video) and has plenty of supporting documentation available online.
Xun and David go through the process of unboxing and assembling a robot explaining the different parts that come with it:
omnidirectional Robotics platform, getting started guide, USB
cable, TFT screen, uSD card, batteries, and power supply to charge the batteries.
The robot's power supply has been carefully designed using a DC-DC converter that will make sure to optimise the consumption
of whatever batteries are being used. It is worth remembering that the charging circuit can only re-charge NiMh batteries.
Every robot comes pre-tested from the factory and is running a program called “Hello User!” This program guides
the user through the basic use of the robot's interface. The screen gives clear instructions on how to manipulate the keypad
and buttons to interact with the software. In this first example, users are invited to type their name and the name they want
to give to their robot. That information will be stored inside the robot's EEPROM memory for future use.
The robot's basic library has been carefully designed and has the ability to play 8-bit music while doing other things. You
will notice how the robot plays a welcome tune while executing the "Hello User!" example.
The robot has two different processors; the one on the control board (top) runs the screen, compass, and other sensors while
the motor board (bottom) runs the motors and reads the line-following sensor array.
Programming the different sensors and actuators on the robot is easy: David and Xun demonstrate how you can make the robot
move and turn with just a few lines of code.
The following videos will explore different characteristics of the robot in depth, from remote controlling it with a universal
TV-remote, to detect distance to objects in the room. Make sure to subscribe to the next video tutorial by the Arduino team
here.
Related products


