- เผยแพร่เมื่อ 8 มี.ค. 2566
- แก้ไขครั้งล่าสุด 29 ส.ค. 2566
- 14 นาที
A Complete Guide to Micrometers
Learn how to calibrate and use micrometers correctly in our comprehensive guide.

What is a Micrometer?
Micrometers (otherwise known as micrometer screw gauges) are essential measurement tools used by mechanical engineers, machinists and workers in other technical trades. They enable workers to take extremely fine measurements, which may be displayed in either imperial or metric formats.
Micrometers allow for a greater degree of measuring accuracy than alternative tools, such as dial calipers and vernier calipers. They are available in digital, dial, and vernier styles. The term 'micrometer' can be traced back to neoclassical Greece and literally translates as ‘small measure.’
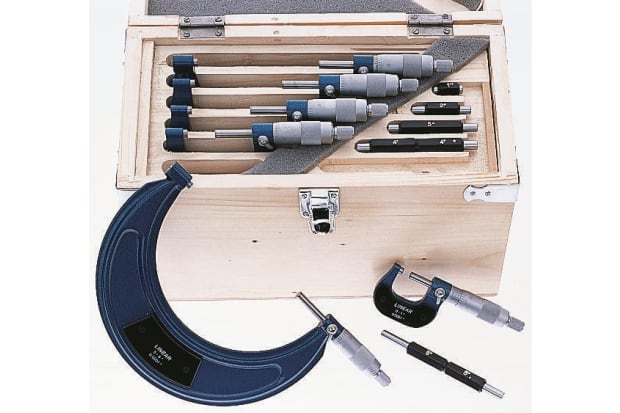
Different types of micrometers have measuring ranges of between 25mm and 1 inch. This translates to the incremental metric measurements of 0-25mm, 25-50mm, 50-75mm and so on. The imperial versions are equal to 0-1 inches, 1-2 inches, 2-3 inches etc. Boxed micrometer sets can also be used for the purpose of taking micrometer readings across a wide range of sizes.
Micrometer Components
In order to understand how a micrometer works, you should first consider the key components of the tool. Analysis of the components should also further your understanding of how to read a micrometer.
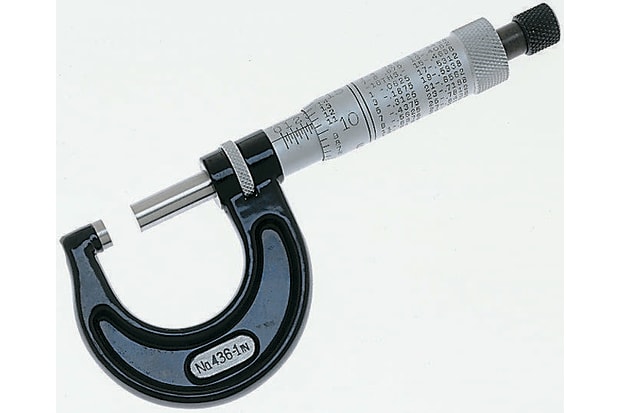
Frame
Micrometer frames are c-shaped and ensure the optimum positioning of the anvil and barrel. Frames may take a variety of shapes and sizes, allowing for desirable functionality of the micrometer. The hub-shaped frame is ideal for taking highly accurate measurements in confined spaces.

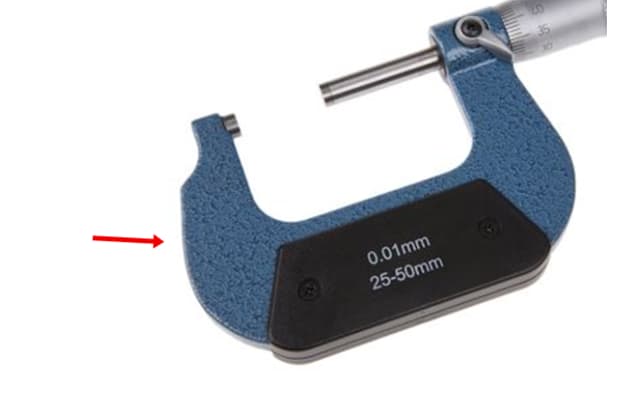
Anvil
The micrometer anvil should be noticeably shiny. It should ensure that the spindle gravitates towards the object, which is firmly secured. The anvil will be kept in consistent contact with the part and may chip unless a high level of care is taken. Quality models typically come complete with carbide-tipped micrometer anvils, which allow for an extended tool-life.

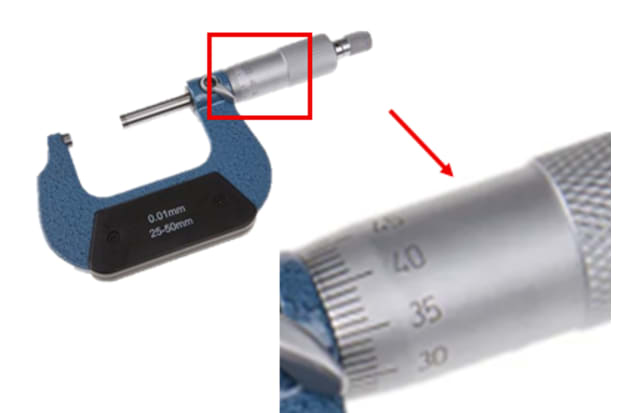
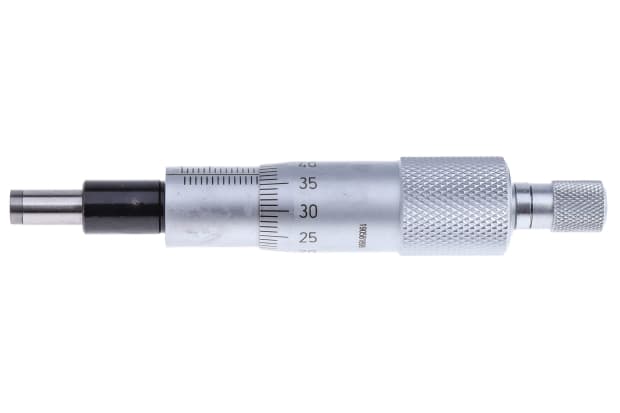
Sleeve or Barrel
The round micrometer sleeve or barrel is kept securely in place and features the linear scale. It is also quite common for vernier markings to be found on this part of the micrometer. This scale allows highly accurate measurements to be taken in degrees of .0001.

Locking Nut
The spindle micrometer locking nut is a particularly helpful feature when it comes to maintaining awareness of the measurement and securing the spindle for small lot gauging. Some micrometers come complete with lock nuts, while others have locking levers. Where possible, it is advisable to choose the locking lever variety due to the relative ease of use and maintenance.

Spindle
Situated next to the measuring faces, the micrometer spindle is projected towards the anvil as a direct result of contact with the thimble.
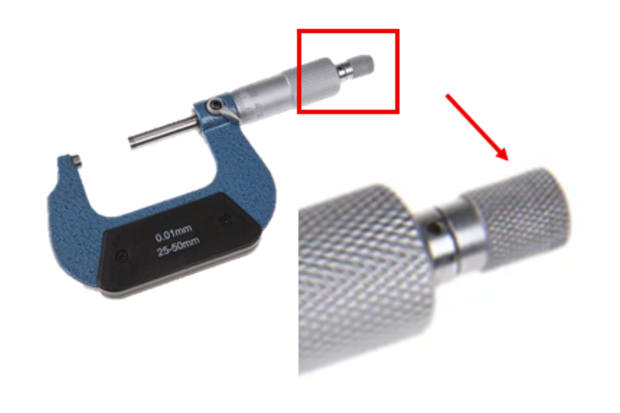
Thimble
You should gently apply pressure from the thumb in order to turn the micrometer thimble. This part features graduated markings, which should be easy to read.
Ratchet Stop
The micrometer ratchet stop can be found on the end of the handle and it restricts the amount of pressure by enabling movement at a calibrated torque.
How Does a Micrometer Work?
Micrometers feature a calibrated screw, or thread, which is located within the spindle and allows for the device's exceptional levels of measuring accuracy. The screw within the micrometer is used for the conversion of particularly small distances for measurement. The spindle can be moved by turning the ratchet knob or thimble until there is light contact between the spindle and anvil. Each 360-degree turn of the spindle has the effect of adjusting the space between the measuring displays by 0.05 in metric and 0.025 inches in imperial.
The thread pitch of the needle has a direct bearing on the level of measuring precision. The spindle is machine-screwed to a very high level of accuracy, with the object being measured positioned directly between the spindle and anvil. Some micrometers feature differential screws, which allow for particularly great levels of measuring accuracy.
It is highly important to maintain the stability of any object that you are measuring with a micrometer. The object should be kept parallel to the anvils and a consistent level of pressure should be applied when taking the measurement.
The integrated ratchet thimble will ensure a high level of measuring accuracy, with this key part functioning as an integrated torque wrench. The process should continue with the turning of the ratchet handle until a repeated clicking is heard. This will provide the assurance of taking the measurement with a consistent level of torque.
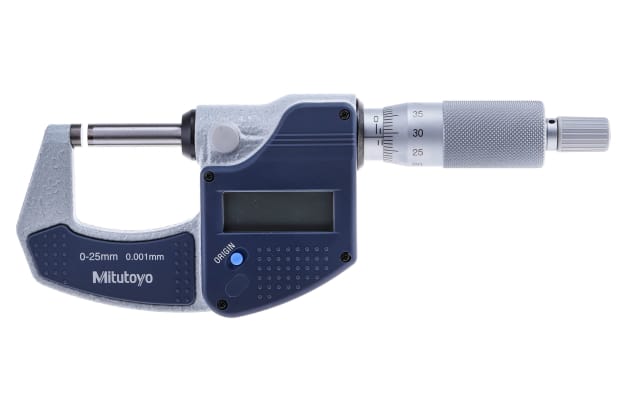
Digital micrometers feature electrical circuits, which allow for digital measurement and exceptionally accurate readings. The measurement will be displayed clearly on the LCD screen.
Why Use a Micrometer?
Micrometers are specially designed for the measurement of very small objects. They allow for the highly precise measurement of any item that fits between the anvil and spindle. Standard types of micrometers can be used for the fine measurement of items under one inch in length, depth, and thickness. However, there are some advanced models that allow more precise measurements to be taken. There is also the option of investing in anvil micrometers for the measurement of diversely shaped and sized objects. Portability, ease of use, and measuring consistency are just a few of the key micrometer advantages.
Types of Micrometer
There are various different types of micrometer available, each suited to varying uses and applications. Outside micrometers are one of the most widely used varieties, but inside and depth micrometers are alternatives which may be more appropriate for use in certain scenarios. Below are some of the most common types of micrometers:
Ball Micrometers
Ball micrometers have spherical anvils. They are used for purposes such as measuring the thickness of walls and establishing the distances between holes and edges. As opposed to tube micrometers, the ball variety can be used to correctly identify the measurement of alternative rounded surfaces.
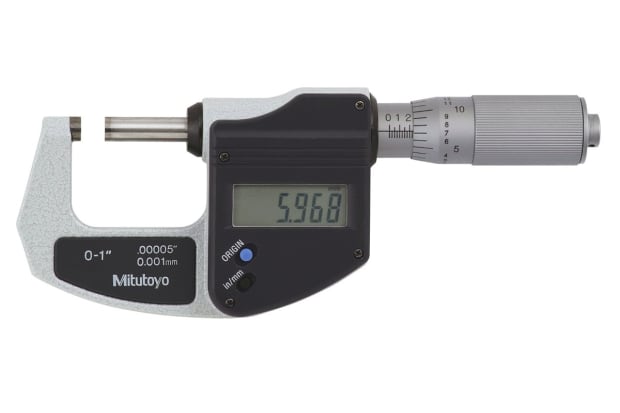
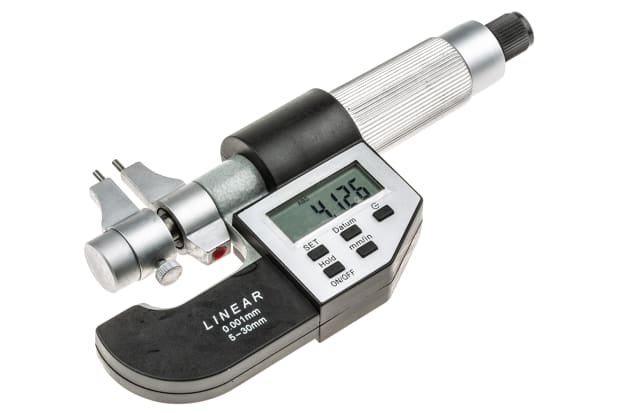
Digital Micrometers
Integrated with decoders for the effective identification of distance, these micrometers present measurements in a digital format.
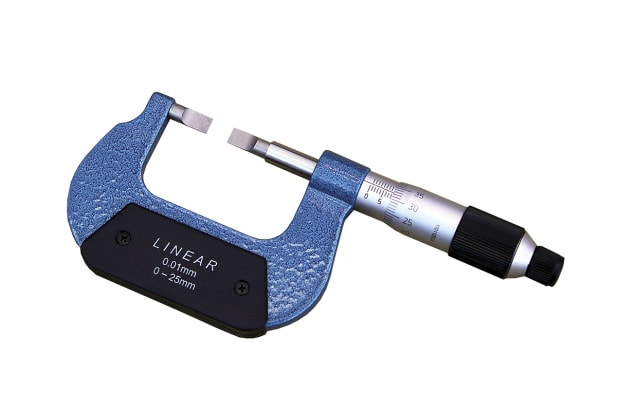
Blade Micrometers
This type of micrometer comes complete with matching narrow tips, or blades.They are particularly helpful when it comes to the measurement of specifically shaped objects, such as those with O-ring grooves.
Tube Micrometers
Designed to measure the thickness of tubes, tube micrometers feature cylindrical anvils which are located perpendicular to the spindle. They allow for quick and accurate measurements when compared with alternative tools.
Other Types of Micrometer
Universal Micrometers
These come complete with interchangeable anvils, which may be flat, spherical, spline, disk, blade, point, or knife edge. You may be expected to use universal micrometers featuring modular components, which allow for outside, mic depth, or alternative functionality.
Pitch Micrometers
Otherwise known as the thread mic, this tool features a specially designed set of thread-shaped tips for successful identification of the screw thread diameter.
Limit Micrometers
Particularly well suited to measuring the thickness of tubes, micrometer limit mics come complete with two anvils and two spindles, functioning as effective snap gauges. The gaps correspond directly to the upper and lower tolerance levels.
Bore Micrometers
Commonly featuring a three-anvil head in combination with a solid base, bore micrometers are ideally suited to the accurate measurement of inside diameters. They are particularly helpful when it comes to the measurement of objects situated around machine fluids and coolants.
Bench Micrometers
Bench micrometers offer extremely high levels of accuracy and are typically used during workplace inspections. They allow for measurement up to somewhere in the region of 20 millionths of an inch, with a repeatability of around a quarter of a millimetre.
V Micrometers
Purpose-made for external measurement, V micrometers come complete with small V-blocks for the anvil. They are ideally suited to the measurement of circle diameter, with equidistant separation of three points. This allows for the effective measurement of three-flute end-mills and twist drills.
How to Read a Micrometer
Micrometers are the ideal tool for the measurement of cylindrical and spherical shaped objects. In order to use a micrometer, you should follow these steps:
- Take time to acquaint yourself with the main technical terms
- Clean the micrometer, using a soft cloth to remove any marks and debris from between the anvil and spindle
- Begin by positioning the item being measured next to the anvil. It is important to keep the object stable and avoid any scratching. You may control the micrometer with your free hand, or alternatively, there is the option of using a stationary vise, leaving both of your hands free for control of the micrometer
- Spin the ratchet anti-clockwise, ensuring that the 0 mark on the thimble is positioned in accordance with the sleeve scale. Keep twisting until the spindle is within close contact of the object; three clicks is a good guide
- The thimble lock should be applied while the micrometer is within close proximity of the object. It should be possible to adjust the spindle as required. Once you are confident that the micrometer has fulfilled its function you can remove the object, taking care to avoid scratching the anvil and spindle surfaces
- Finally, record the reading, ensuring that the spindle is kept stable
The following sections will give you more information on how to read specific types of micrometers:
Metric Micrometer
When using a metric micrometer, It is necessary to acquaint yourself with the number scales that are displayed on the micrometer thimbles. It is common for the top line of the sleeve to feature millimetres, with the line below that featuring half millimetres.
The reading of the metric micrometer should begin with recording the number of millimetres. An initial reading of 7 would correspond to 7mm. Each half mark on the thimble should be taken into account. This means carefully reading the lower bar and correctly identifying the corresponding number of 0.01mm.
Vernier Micrometer
Using a micrometer integrated with the vernier scale, the reading should be taken from the sleeve index line. This allows for precise readings, within 0.001mm. The initial reading should be taken from the sleeve. The measurements are likely to be featured in intervals of 0.25 millimetres or 0.025 inches.
The next step is to take the reading from the thimble. These measurements are likely to be featured in 0.1 millimetre or 0.01-inch intervals. The final reading should be taken from the vernier scale, which you will find on the sleeve, directly adjacent to the first set of graduations.
The vernier micrometer reading is displayed in the format of 0.001 mm or 0.0001 inches, establishing the size of the object with extreme accuracy.
You should be aware that fluctuations in temperature are likely to adversely affect the micrometer reading. Remember not to keep your micrometer in your pocket or within a working environment with excessive heat levels.
Customary or Imperial Micrometer
The spindle of an imperial micrometer features graduated levels of 40 threads per inch. Each turn results in movement of the spindle around an axis of 0.0025 inches, which equates to the area between adjacent graduations on the sleeve.
There are 25 graduations on the thimble, meaning that the measurements can be divided the corresponding number of times. The visible reading corresponds directly to the number of whole divisions that are featured on the sleeve scale, multiplied by 25. This means that the resulting diameter is displayed in thousandths of an inch.
Micrometer Measurement Conversions
This section details how to convert your micrometer result into another measurement unit.
Micrometers to mm
The quickest and easiest way to convert micrometers (um) to millimetres is to divide by 1000. An alternative method is to move the decimal point three units to the left of the original figure.
Micrometers to inches
There are 25,400 micrometers to every inch, with 1 metre being equivalent to 1,000,000 micrometers. You should also be aware that each micrometer equals 3.9×10e-5 (with e meaning to the power of).
Micrometers to cm
1um is equivalent to 0.0001cm (otherwise written as10e-4).
How to Calibrate a Micrometer
To make sure that your micrometer returns accurate data, you will need to ensure that your tool is kept calibrated.
How Do I Test if My Micrometer Needs Calibrating?
Standard one-inch micrometers have readout divisions of 0.001 inch and an accuracy level of ±0.0001 inch. However, you must ensure that both the micrometer and the object being measured are at room temperature for this high level of accuracy.
The micrometer reading test will involve the measurement of guide blocks in order to ascertain the desirable accuracy. If such a gauge block is known to be 0.75000 ±0.00005inch then the micrometer should give a reading of 0.7500 inch. If the corresponding measurement is 0.7503 or more, then the micrometer will be deemed to be out of calibration.
If you want to avoid such calibration issues then you must take an exceptional level of care, carefully cleaning, using, and storing the micrometer for continued use. It might be necessary to perform micrometer adjustment and recalibration in some instances. However, adjustment won’t be sufficient when it comes to correcting issues such as the micrometer being misshapen or of the incorrect size. Repair will be necessary for such instances.
Calibrating A Micrometer
The following steps explain how to calibrate a micrometer and adjust it to zero.
- Before proceeding to calibration, it is necessary to ensure that the tool is working effectively and that there aren’t any binding or related issues. You should clean the anvils and make sure that the reading is set to zero
- The next step will be to check the micrometer at a range of test points using gauge blocks or alternative standards with high levels of accuracy. A variety of readings should be taken at each test point. The tolerance level of the particular micrometer should be taken into account when writing down the readings
- It is highly likely that your micrometer features a small pin spanner. This should allow for the turning of the sleeve in relation to the barrel, ensuring the optimum repositioning of the zero line in relation to the thimble markings
- You can expect to find a small hole in the sleeve, designed for acceptance of the spanner’s pin. In following this calibration process, you will have the assurance of avoiding the non-zero error, which may otherwise occur when the jaws are shut. You are advised to repeat the zeroing process a few times for the assurance of micrometer accuracy
FAQs
What is a Zero Error?
If the zero mark on the thimble does not correspond with the datum line on the main scale then there will be a zero error. The reading on the main scale should also equal zero.
What is the Difference Between Micron and Micrometer?
The micron is a measurement of one-millionth of a metre, while the micrometer is a measuring tool featuring a calibrated screw.
What is Micrometer Accuracy?
Micrometer accuracy may be considered in relation to two key factors - the accuracy of the screw thread (or digital scale), and any process errors. The expected accuracy of a micrometer as established using the Vernier scale is 0.01mm.
What is the Difference Between a Micrometer and a Caliper?
Micrometers and Vernier calipers are both commonly used to establish the sizes of different objects. However, there is some contrast between the efficiency and usage of each of these tools. Calipers might be used to establish physical dimensions, interior measurements, exterior measurements and depths. However, micrometers are generally used for more specific purposes such as measuring exterior or inside dimensions. The expected accuracy of Vernier calipers is typically between ±0.001, with the accuracy of micrometers generally being ±0.00005.
For more information, check out our complete guide to calipers.
What is the Least Count of Micrometer?
The least count of a manually operated micrometer is 0.01mm. The least count of a digital micrometer is 0.001mm.
What is the Symbol for Micrometer?
The micrometer symbol as used by the International Bureau of Weights and Measures is μm. The micrometer is an SI derived unit of length which equals 1×10⁻⁶ metre (SI standard prefix "micro-" = 10−6), equivalent to one-millionth of a metre or one-thousandth of a millimetre.
Which is Bigger, Nano or Micro?
1 micro is equivalent to 1,000 nanos.
Popular Brands
Mitutoyo
Browse our extensive range of Mitutoyo micrometers to find the product that matches your requirements.
RS Pro
Explore the full range of micrometers available from our own in-house brand, RS Pro, and shop online today.
Starrett
Shop Starrett micrometers and choose a product that matches your needs with quality and accuracy firmly in mind.
ลิงก์ที่เกี่ยวข้อ
- Micrometers
- Norgren for use with Industrial Automation Equipment, Mechanical Engineering Workshops Vacuum Pump
- Norgren for use with Industrial Automation Equipment, Mechanical Engineering Workshops Pneumatic Fitting
- Norgren for use with Mechanical Engineering Workshops, Industrial Automation Equipment Vacuum Pump
- SAM 710-M3 Basic Micrometer
- Measuring Sets
- Polishing & Finishing Accessories
- RAFI Label for Use with Electrical Engineering Mechanical And System Engineering